In modern asana practice there tends to be a lot of emphasis on stretching the hamstrings, and not nearly so much focus on strengthening them. Over time, this can lead to injuries, particularly for yogis who are naturally flexible. I’m one of them – I first injured my right hamstring tendon when a teacher over-zealously adjusted me in Supta padangusthasana (in her defense, I should have spoken up. Now I’m a little older and wiser I would). Both my right and left hamstring tendons suffered when I practiced the Ashtanga primary series (so many forward bends!)
One of the most challenging things about these injuries was that when my body was cool, I was very aware of them – they hurt like hell. As soon as I warmed up, I didn’t feel a thing. I could flow through a practice with no discomfort whatsoever, bending my knees to protect my hamstrings in all my forward folds, thinking I was being careful enough not be doing any further damage. Then I’d cool down during savasana, and walking down the stairs out of the studio I’d be near tears because I was in so much pain.
When my hamstrings were at their worst, sitting down was painful. Walking hurt. Down dog? Forget about it. I had to step away from vinyasa all together for a while. It took years of rehabilitation to get them back to where they are now, and I still incorporate hamstring strength work in my practice as a form of ongoing management.
Over the years, I’ve met countless yogis with similar stories about hamstring injuries. We put so much pressure on ourselves to get into pretty, Instagram-worthy poses, and the damage we do to our bodies is anything but yogic.
If we want our yoga practice to have longevity – if we want to keep practicing into our 60s, 70s, 80s and beyond – we need to balance mobility with strength for a healthy, functional body.
Get to know your Hamstrings
The hamstrings are a group of three muscles (semimembranosus, semitendinosus and biceps femoris) that connect the ischial tuberosities (aka sitting bones) to the tibia and fibula (the top of the lower leg, behind the knee).
Because the hamstrings cross two joints (the back of the hip and the back of the knee) they have two functions:
- They extend the hip joint when the trunk is fixed:

- They flex the knee joint:
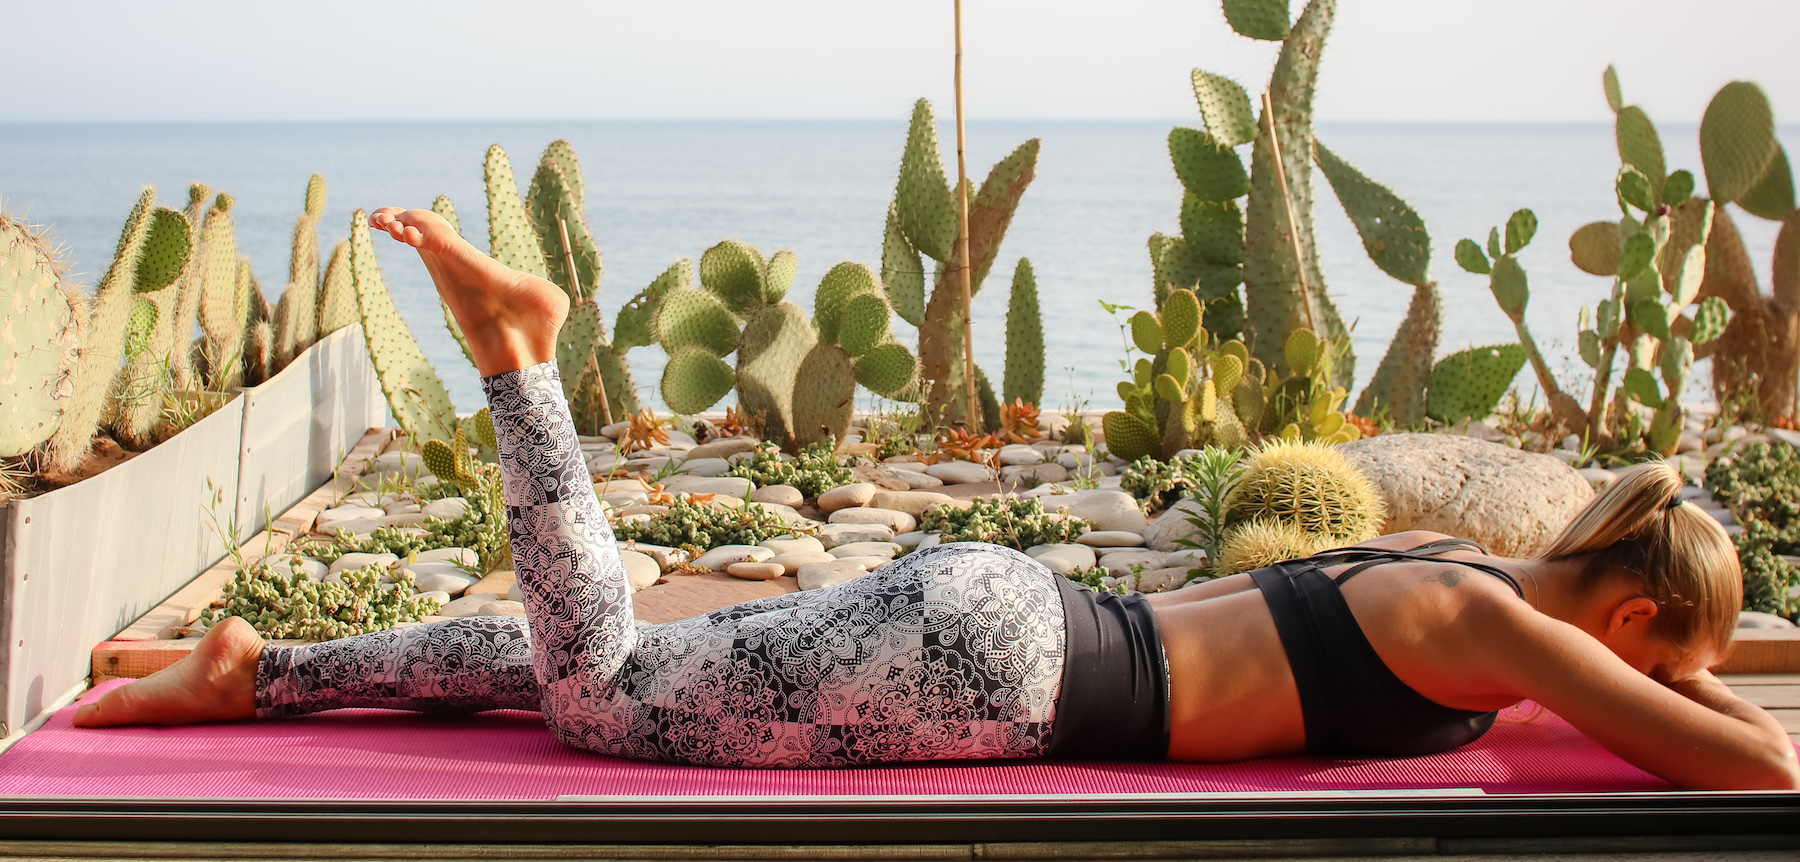
Injuries can occur anywhere along the length of the hamstring but in my experience, for yogis the most common site for injury is in the tendons that connect the hamstrings to the sitting bones. Tendinopathy and small tears at this location can be incredibly painful, and unfortunately super-slow to heal. Hopefully you’ve never had the misfortune to experience this – let’s try to keep it that way!
Building Strength
There are three ways we can engage our muscles to build strength:
- Concentric contraction, during which we engage and shorten the muscle and decrease the angle at the joint. An example would be the first phase of a hamstring curl, while we’re bending the knee.
- Eccentric contraction, during which the muscle is still loaded and working, but it’s becoming longer and the angle at the joint is increasing. An example would be the second phase of a hamstring curl, when we’re slowly straightening the leg.
- Isometric contraction, during which we’re engaging the muscle but it’s neither shortening nor lengthening, and the angle of the joint remains consistent. An example would be holding a hamstring curl halfway.
In order to strengthen our hamstring muscles and tendons, ideally we want to incorporate all three types of contraction in a program to build strength.
Asanas
These are all common yoga postures, and you’re probably already familiar with them. But these tips and variations might encourage you to change the way you practice them in order to build up your hamstring strength. They can be incorporated into a general sequence.
Salabhasana – Locust Pose (plus bent knee variation)
Salabhasana is a classic yoga asana that strengthens the whole posterior chain – the muscles and connective tissue that run all the way down the back of the body. We’ll add a slight variation to the classic version of the pose to fire up the hamstrings even more.
Begin lying face down, with your arms alongside your torso and palms down. Your feet and knees can be together or hip-width apart. Gently press your pubic bone into the floor and feel your lower back lengthening and your deep core muscles switching on. This is an important step to stabilise and protect your lower back. Next, gently draw your shoulder blades towards each other. Take an inhalation, then exhale to lift your head, chest, arms and legs off the floor.
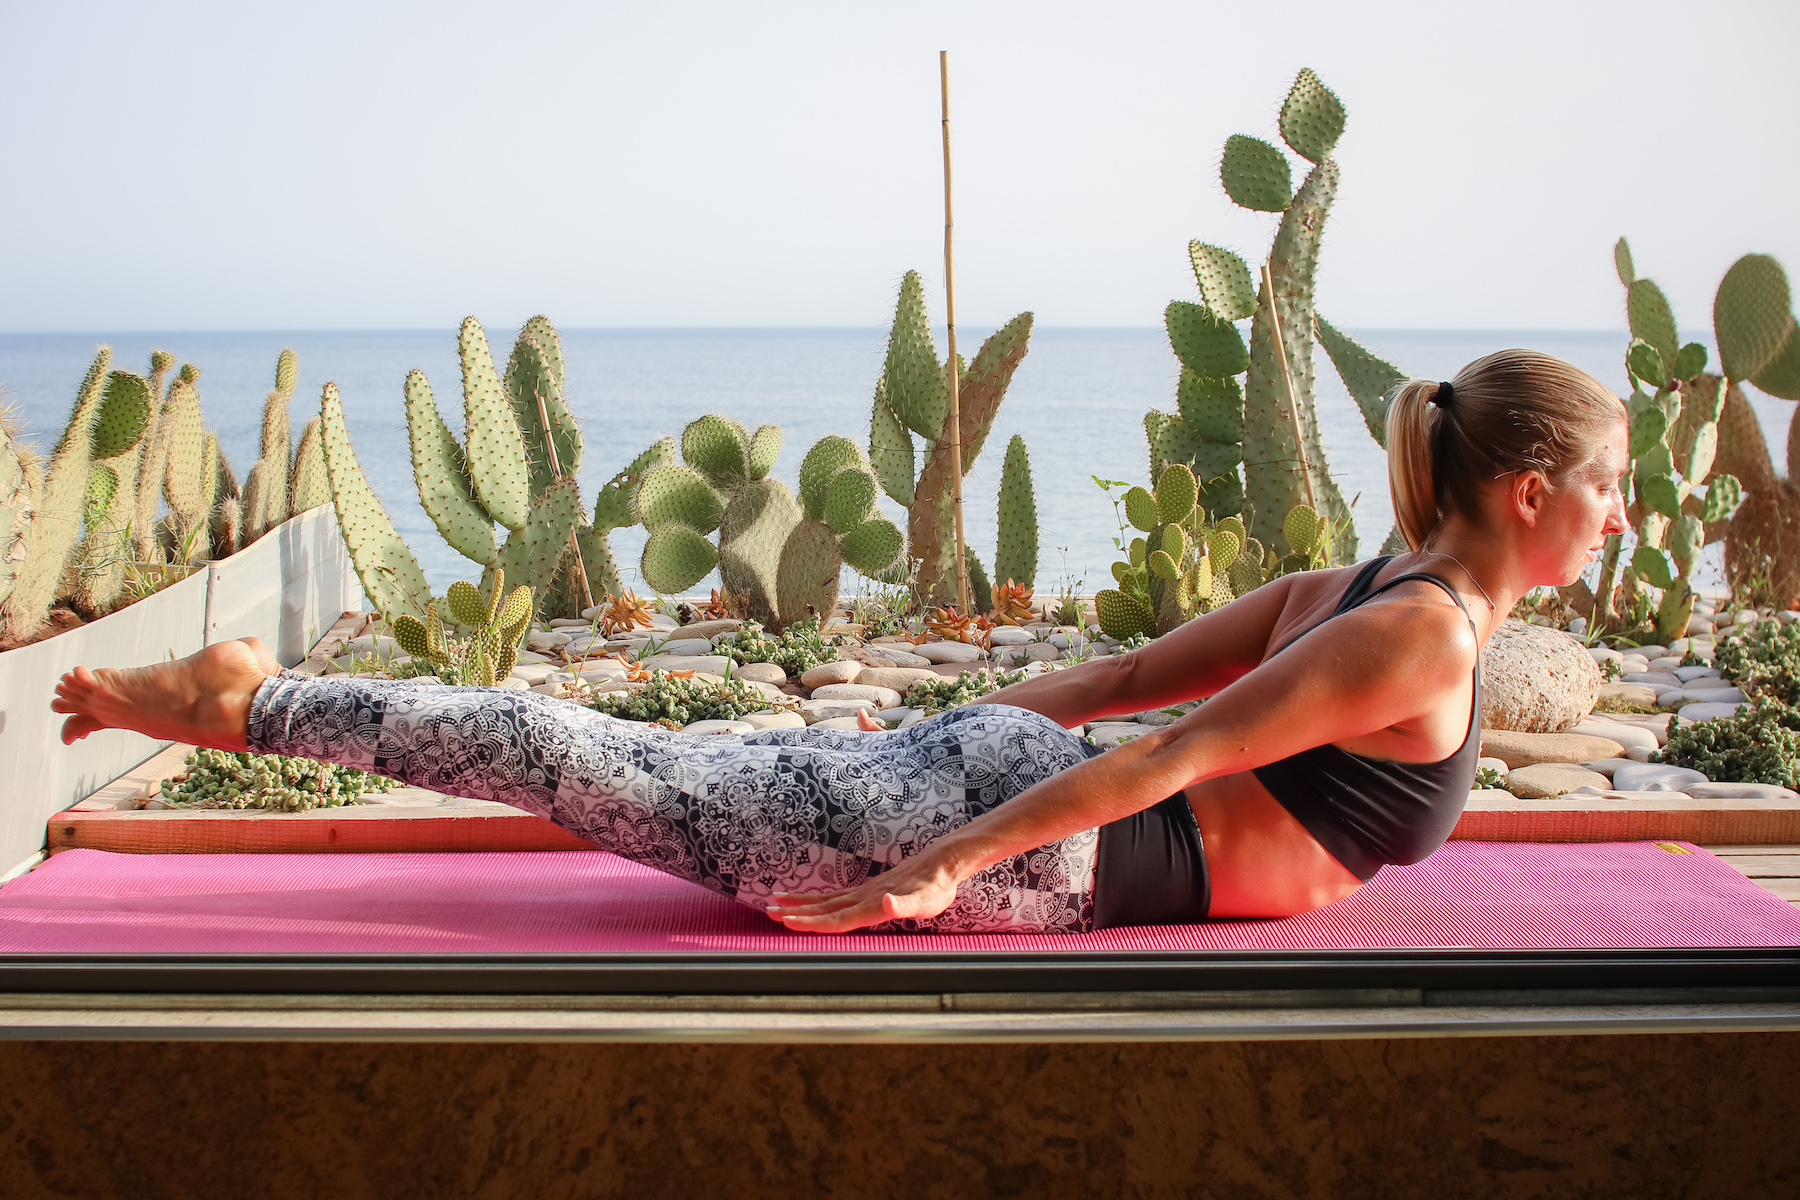
Focus more on creating length than height: draw the crown of your head forward as you reach your feet back.
Use your fingers to palpate your hamstrings (give them a gentle poke or squeeze). You should be able to feel that they’re lightly working. Now bend your knees slightly and palpate your hamstrings again. Now they should be really firing!

Hold and breathe… stay for five to eight breaths, then gently lower down to the floor. Turn your head to one side and take a couple of resting breaths. Repeat twice more.
After you’re done, give your hips a little side to side wiggle or windscreen-wiper your legs to release any tension from your lower back.
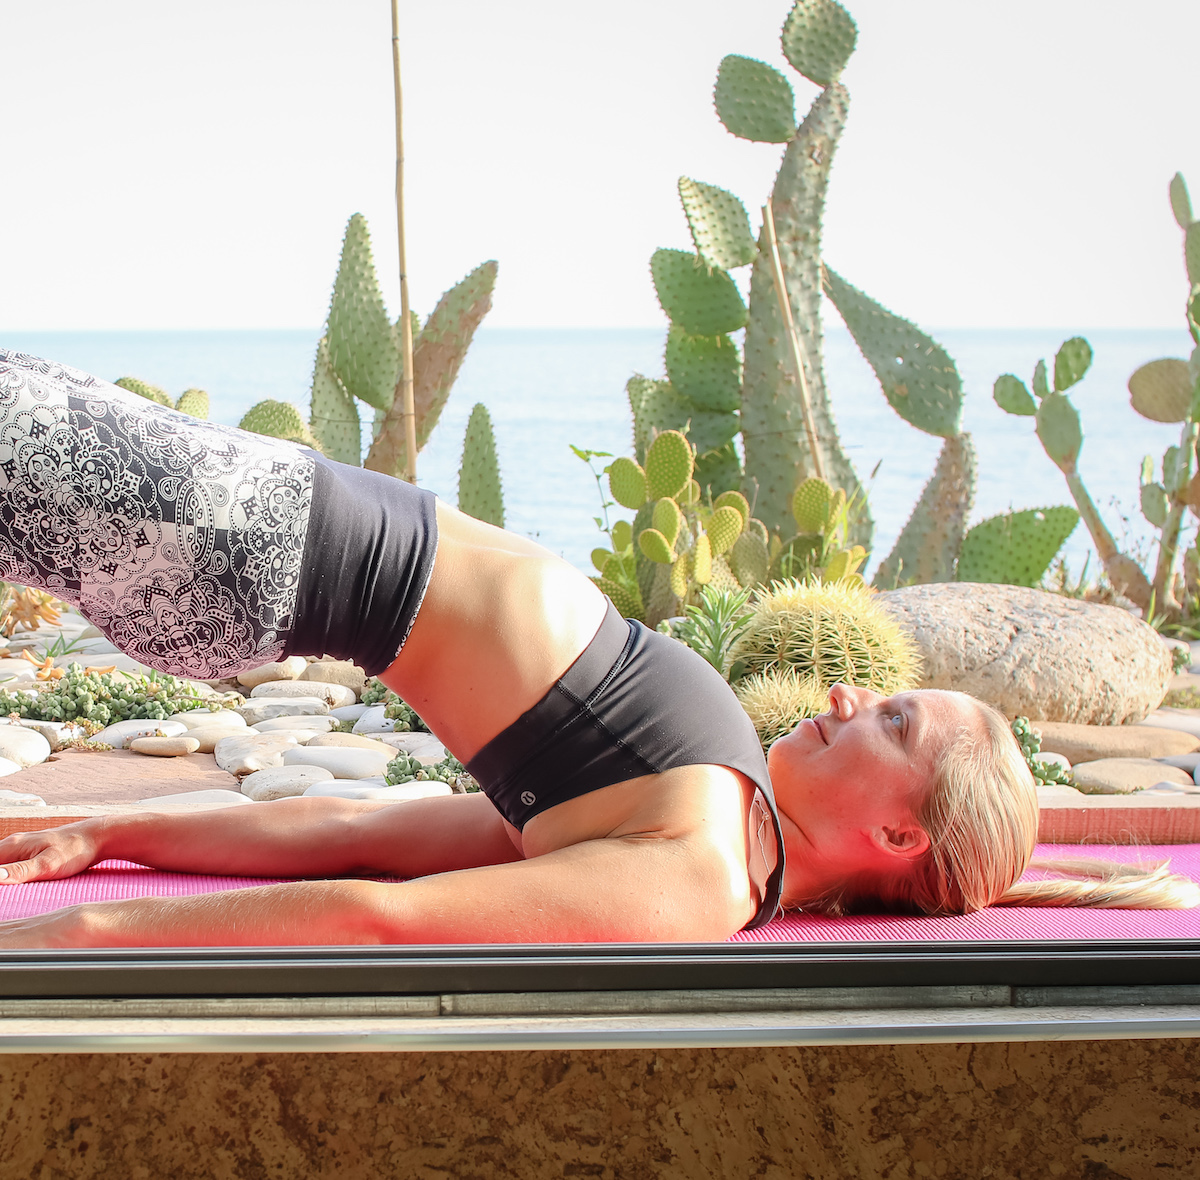
Setu bandha sarvangasana – Bridge pose (plus one-legged variation)
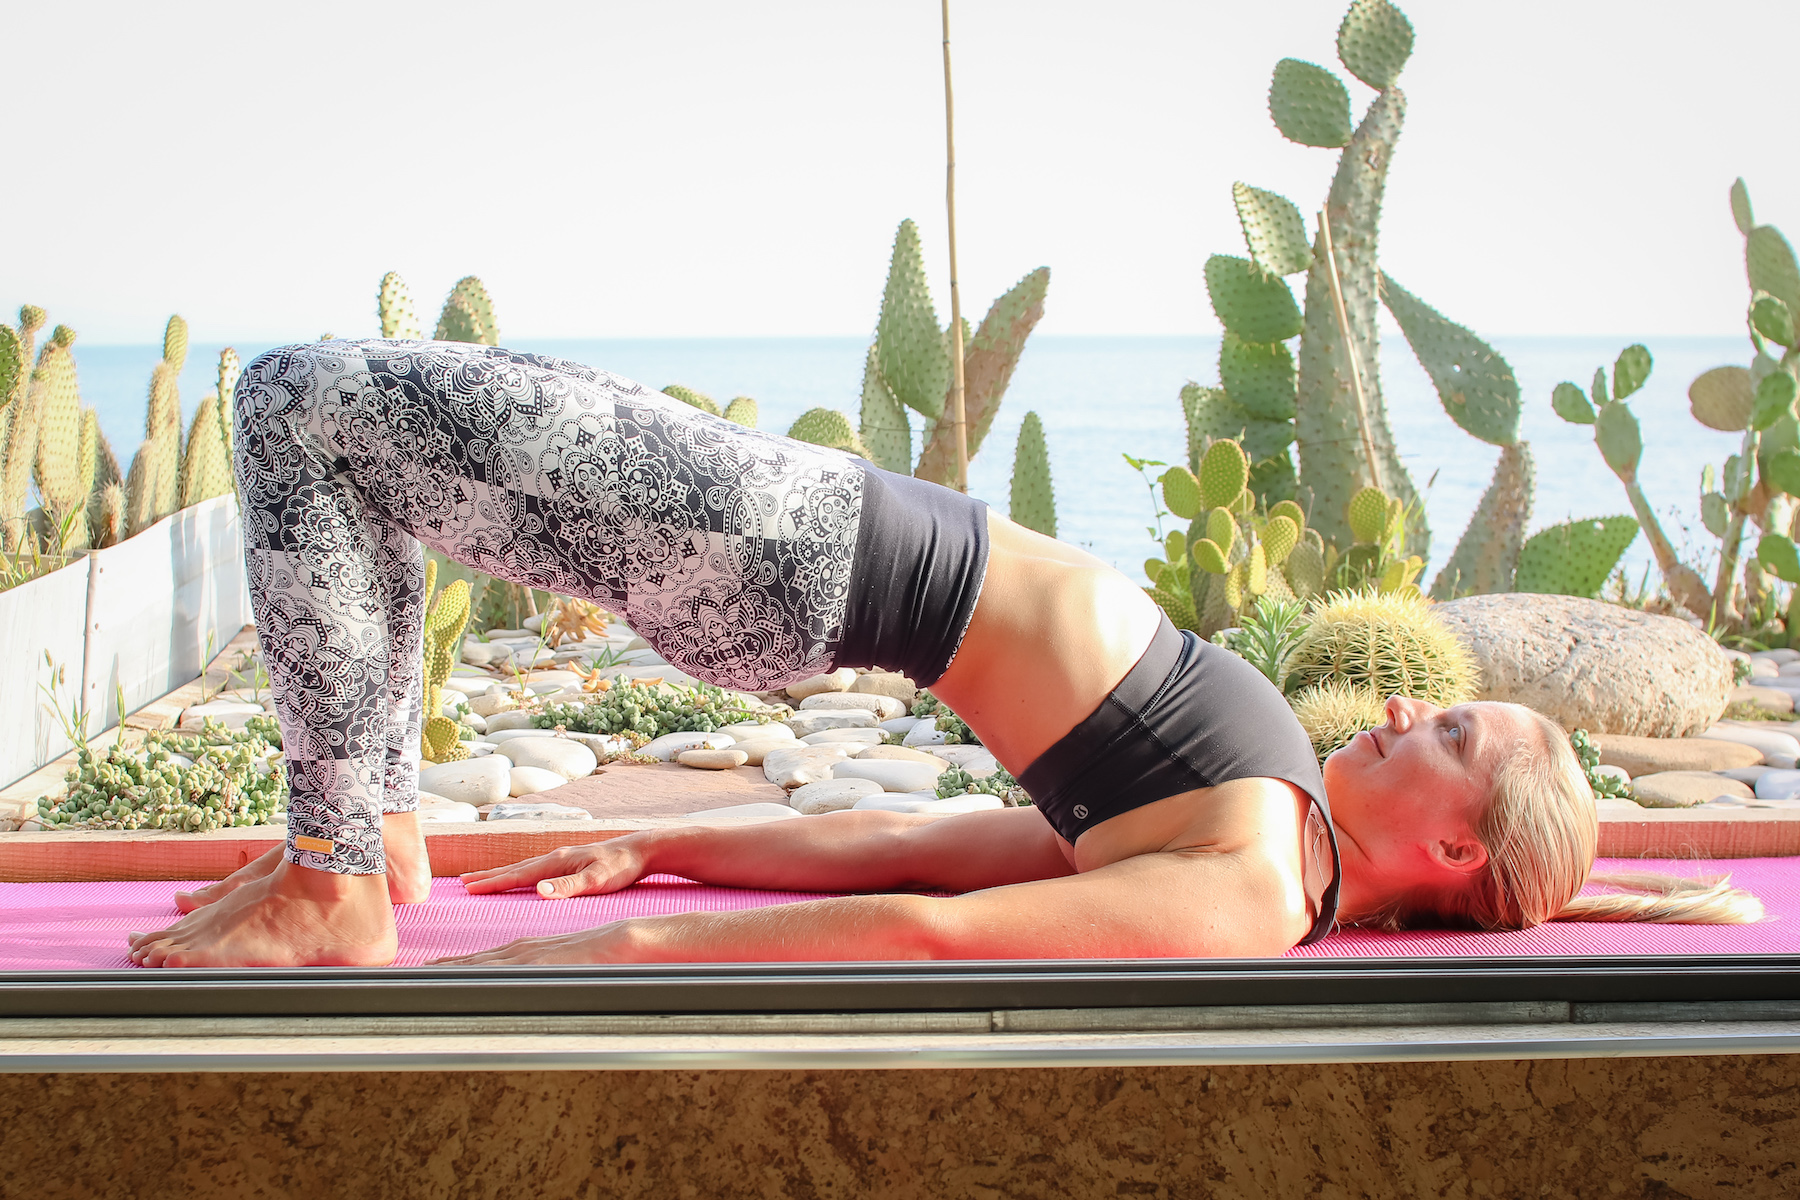
Lie supine, with your knees bent and feet flat on the floor. Rest your arms alongside of your torso and position your feet hip-width apart and parallel, just outside the reach of your fingertips.
Inhale and flatten your lower back against the floor, feeling your core muscles engage lightly. Exhale and peel your spine off the floor, starting with your tailbone and raising one vertebra at a time. Inhale, press your feet into the floor and hold, perhaps lift your chest a little higher if you feel you have the space. Exhale, roll back down one vertebra at a time. Repeat x 10.
Rest for a few breaths, then roll up again, hold, and breathe. With your feet, push the floor away and feel your quads engage. Now imagine your feet are very gently dragging the floor towards you and feel your hamstrings take over. If the drag back causes any pinching feelings in your lower back, the just press your feet straight down – you’ll still be activating your hammies. After 5-10 breaths, roll back down. Rest for a couple of breaths. Repeat x 2.
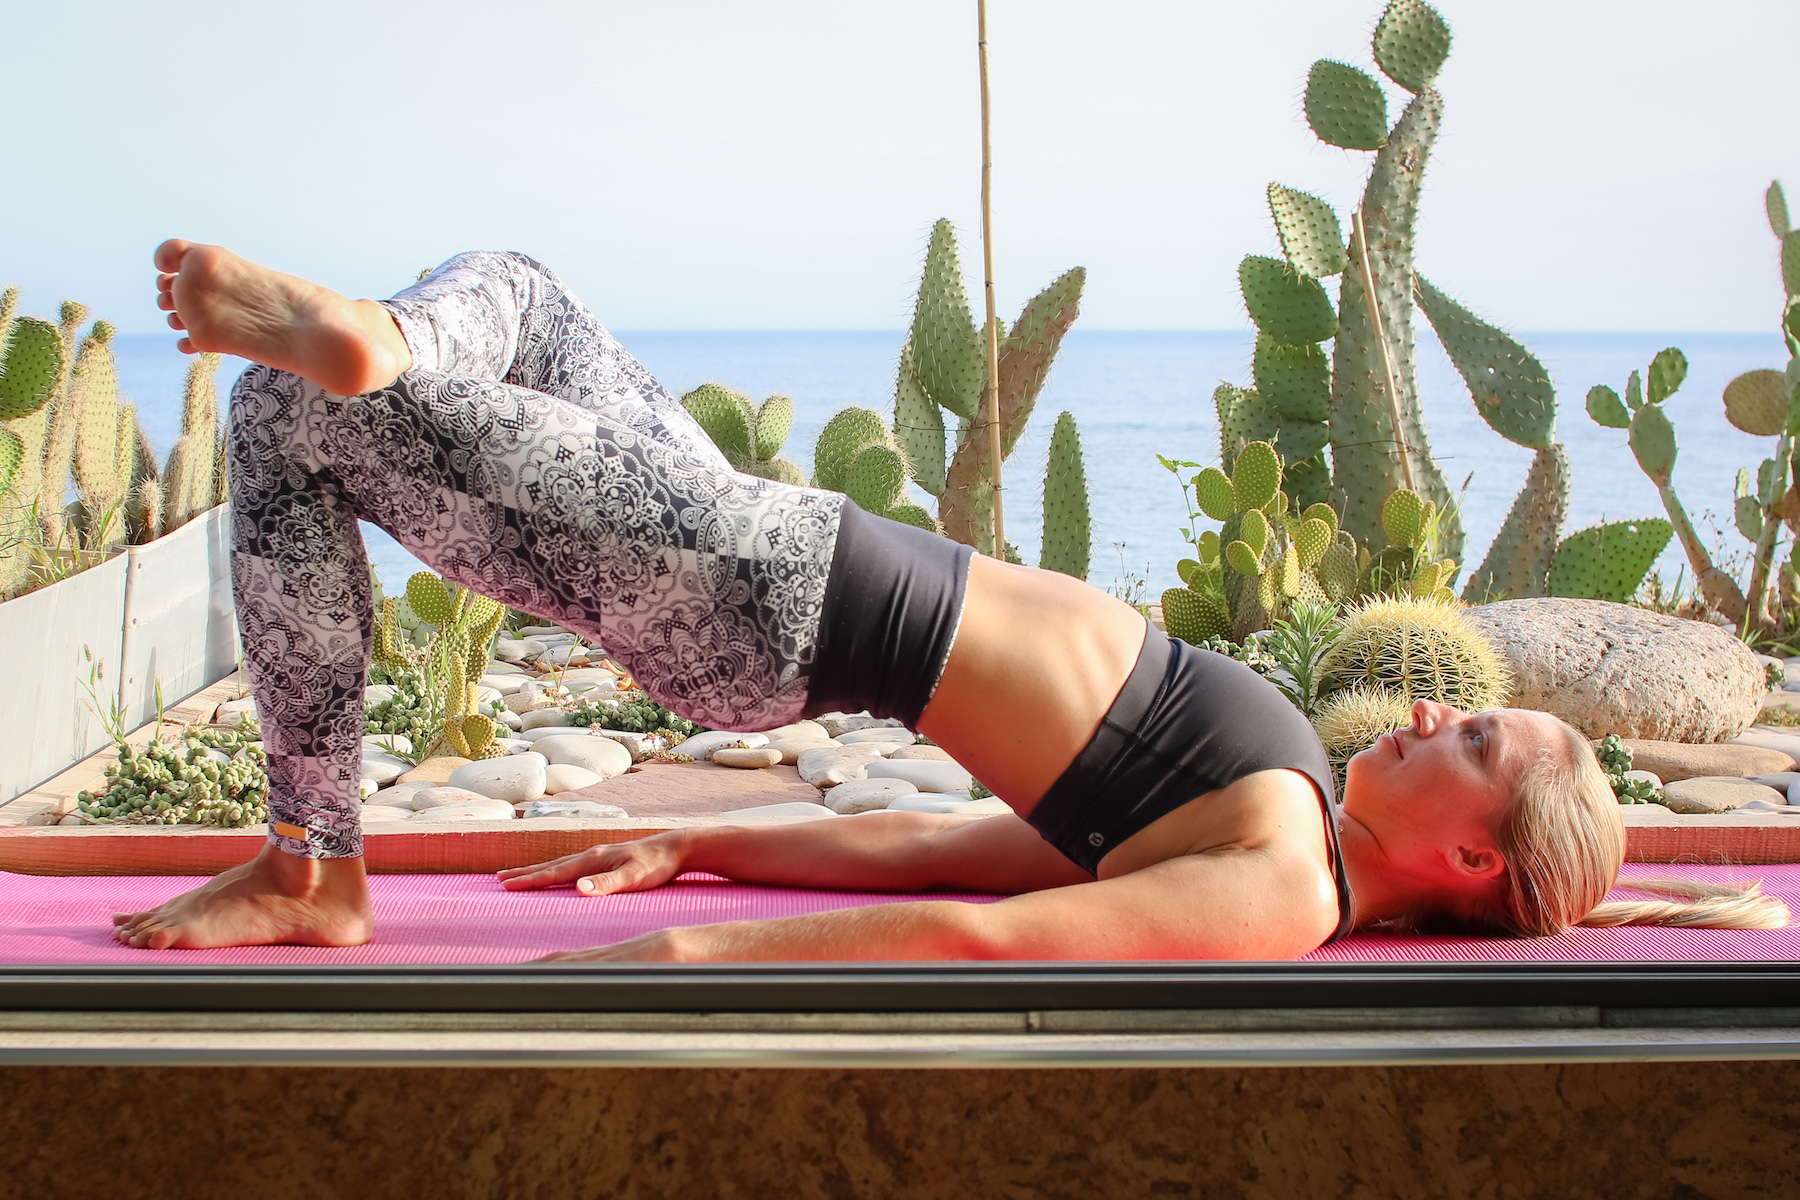
Option to step it up: if this is feeling pretty good, scale up with a one-legged bridge. Start in the same position as previously, then cross your left ankle over your right thigh, making a figure-4 shape with your legs. Firmly anchor your right foot into the earth, keeping the base of the big toe grounded. This time simply exhale to roll up and inhale to roll down. Keep your deep core muscles on to stabilise your lower back, and focus on smooth, steady movements not height. Only lifting half way is fine. Repeat x 8-10, then change sides.
After you’re done, take your feet to mat-width and let your knees fall in against each other in a tepee shape. After a few resting breaths here, bring your knees to your chest for a hug.
Virabhadrasana III – Warrior III (dynamic variation)
Stand in Tadasana (Mountain pose) at the front of your mat. Bring your hands to heart centre into Anjali mudra (prayer position) and look out ahead, fixing your gaze to a single point. Shift your weight to your right foot, exhale and pivot forward from your hips, raising your left leg behind so that your torso and back leg are all in one line. Tilt forward until your torso and back leg are parallel to the floor (feel free to scale it back initially if you find it challenging to maintain control and balance). Slowly inhale back upright. Focus on keeping a tiny, invisible bend in the standing leg rather than locking out the knee, and aim to keep your hips parallel to the floor.
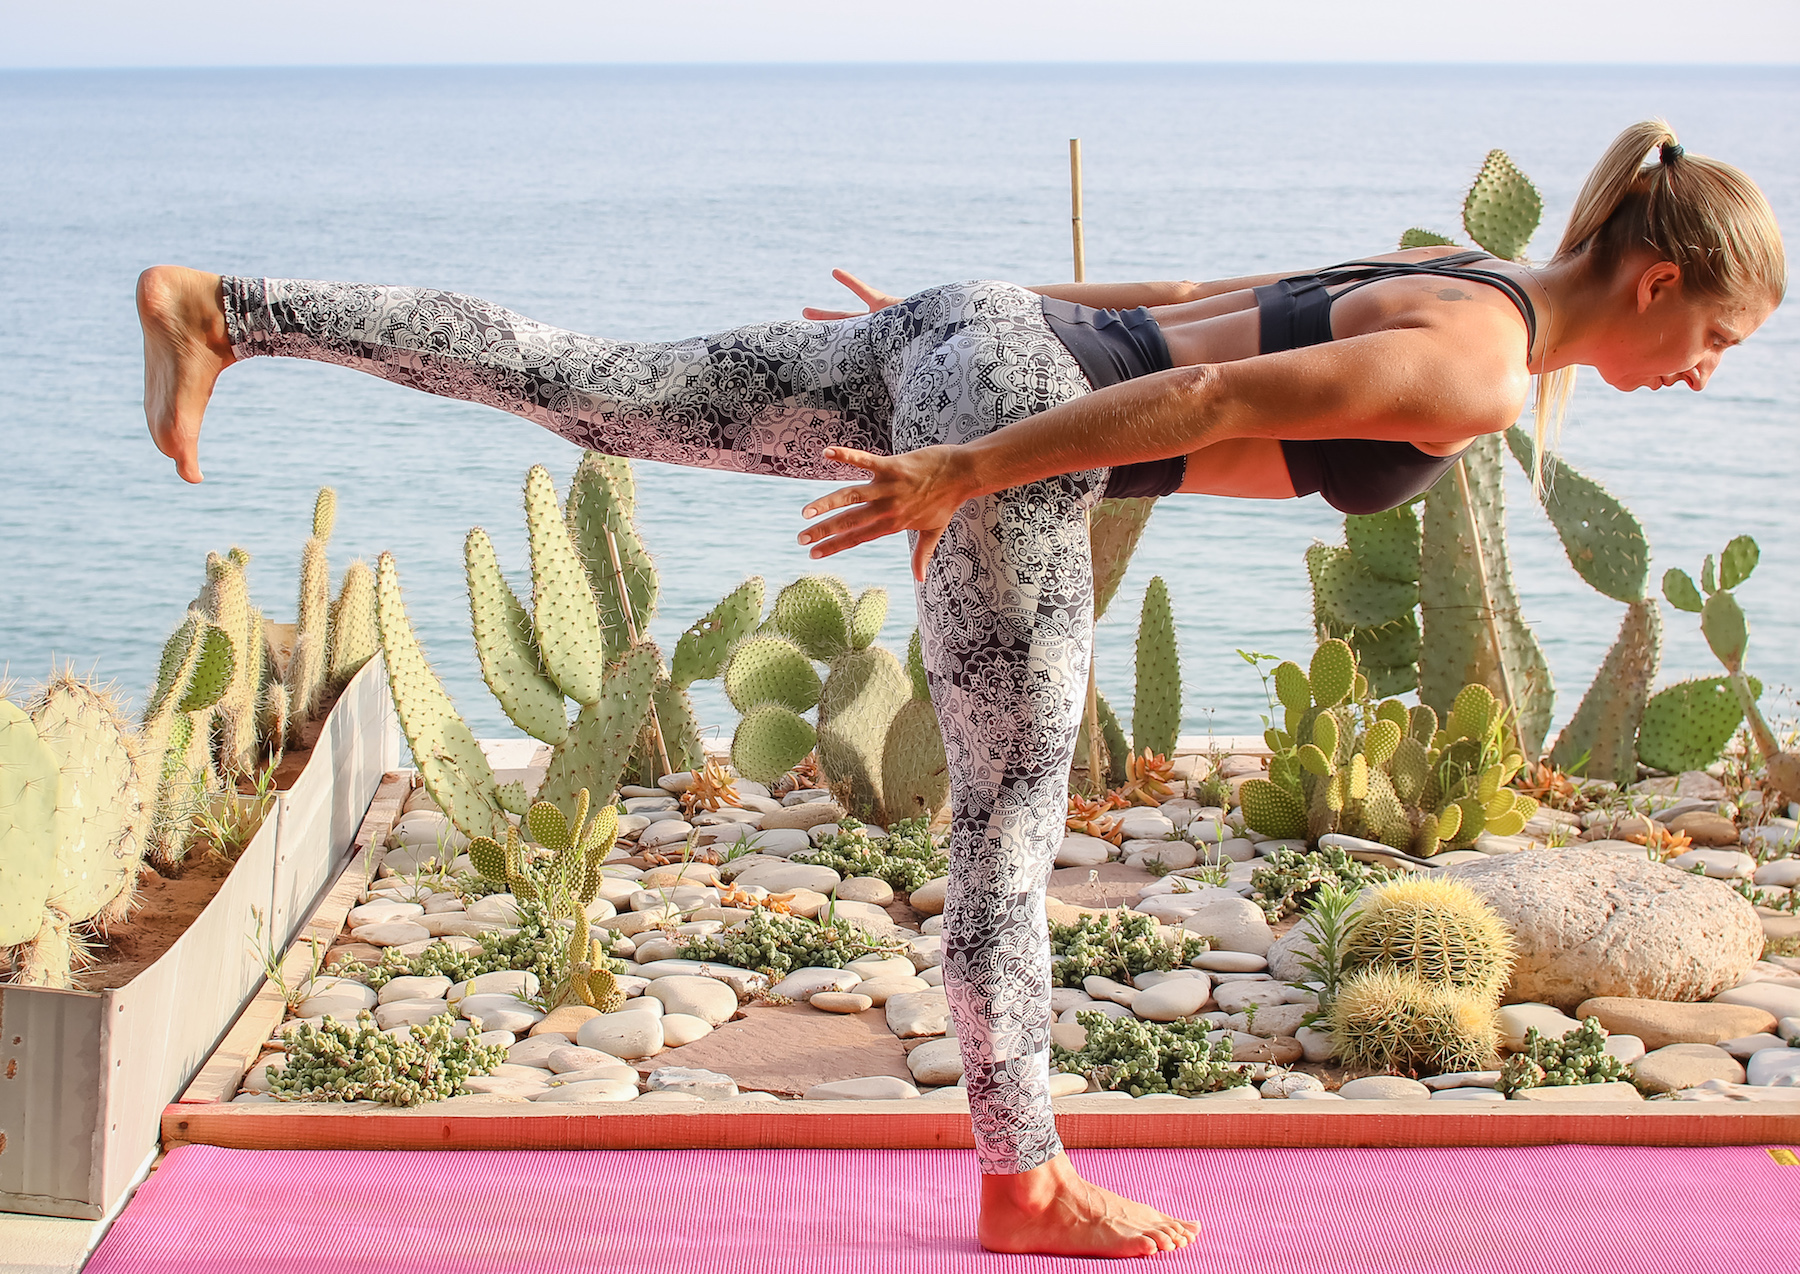
A slow, controlled movement on the way back up is key – this eccentric hamstring engagement will help strengthen the tendons. Repeat x 10, then change sides.
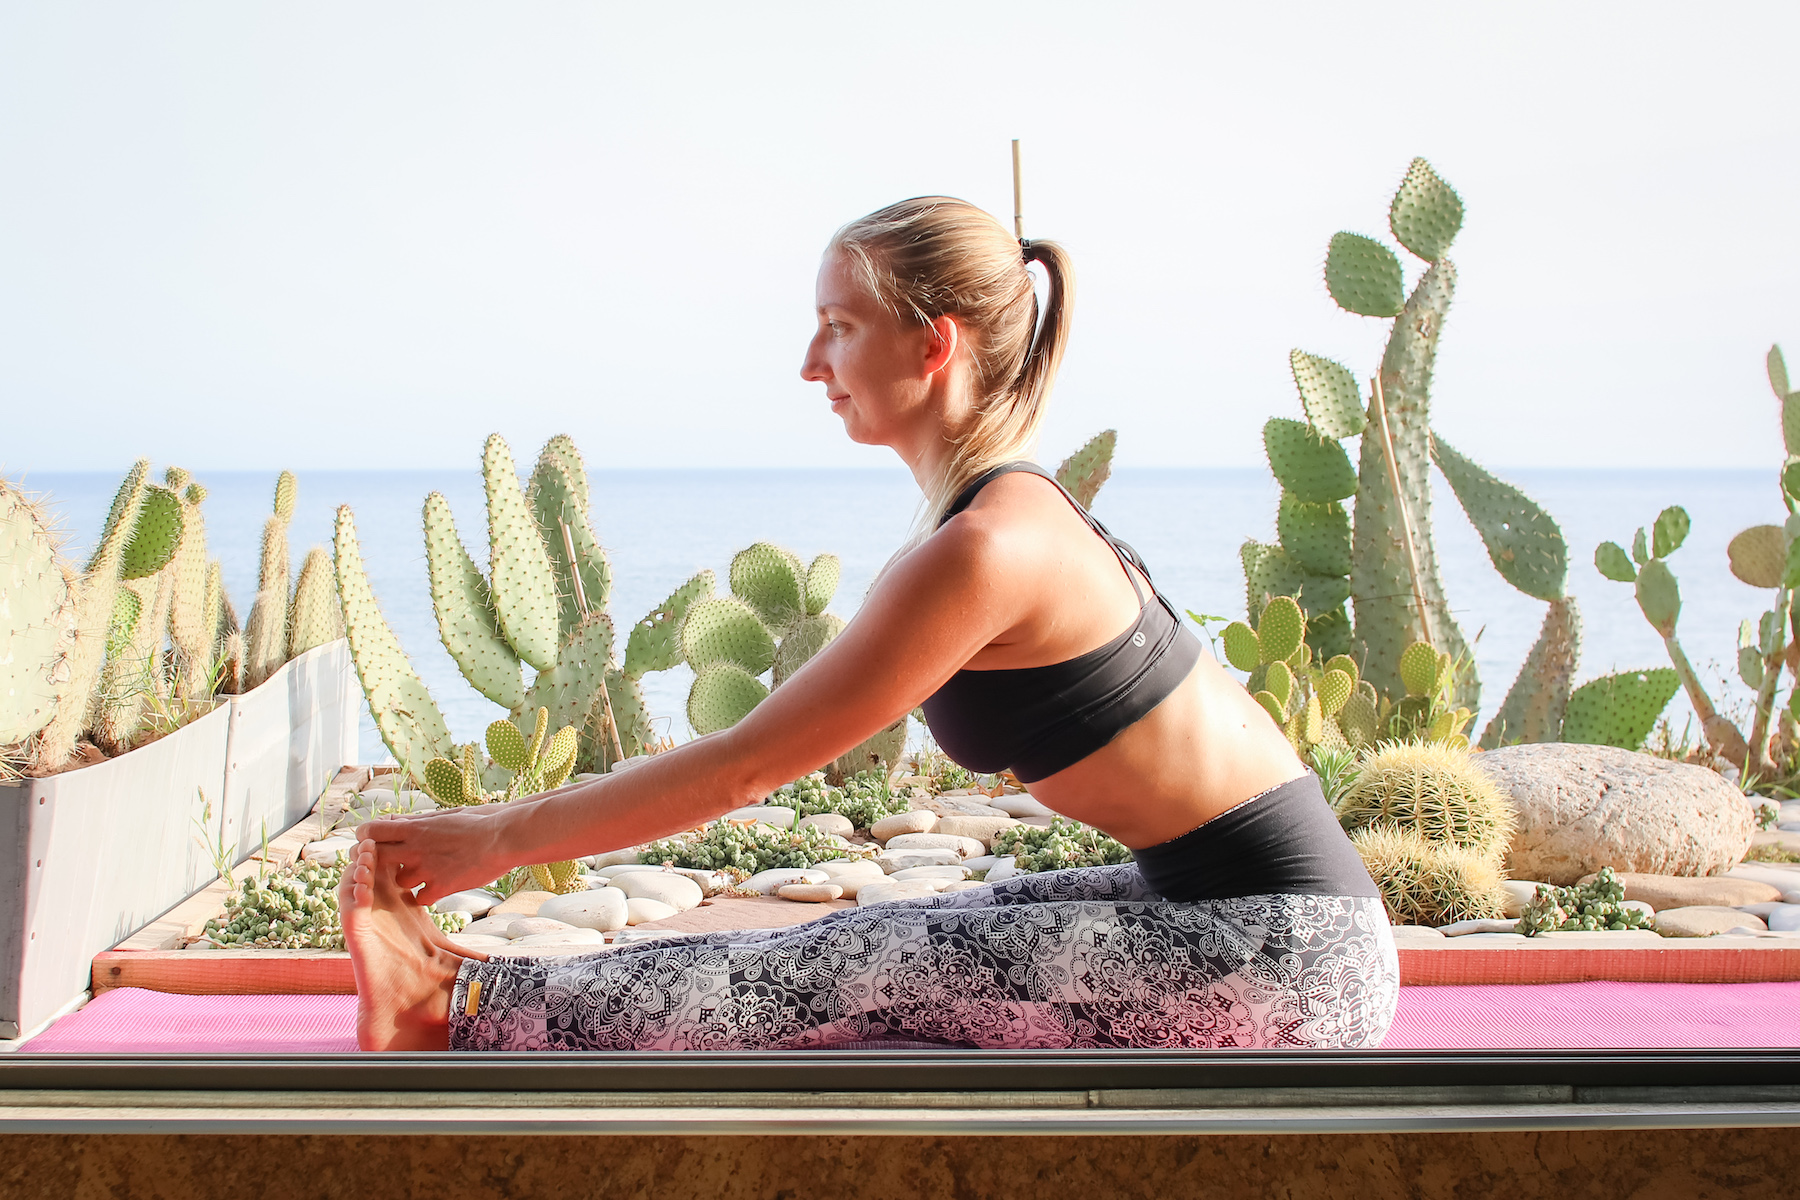
Paschimottanasana – Seated Forward Bend
Paschimottanasana is generally included in a sequence to increase hamstring flexibility. if you’re someone who’s already very flexible and needs to build strength, I suggest modifying the way you practice this pose to focus on engaging your hamstrings rather than stretching them. If you already have hamstring injuries you may be best off skipping this pose altogether for a while.
From Dandasana (Staff pose) inhale as you lift your chest, and exhale begin to walk your hands forward, hingeing from your hips and leading with your heart. Back off from the stretch – just find the first layer of resistance. Then engage your hammies isometrically by gently pressing your heels down against the floor, and imagine your heels are glued to the floor and you’re lightly trying to drag the floor back towards you.
Hold for five to 10 breaths, then inhale and walk your hands back in.
Supta Padangusthasana – Reclined Big Toe Pose
Also a great pose for stretching hamstrings, I believe everyone would benefit from moving into this pose from a place of strength, rather than simply hanging out here.
Lying on your back, extend your left leg along the floor (I like it pressed against a wall). Bring your right knee to your chest and loop your strap around the ball of your foot (even if you don’t think you need a strap. In fact, especially I you think you don’t need a strap). Start with a good bend in your knee, and imagine you’re holding a baby elephant on the sole of your right foot. He’s so heavy that your leg has to work pretty hard to support him. Without dropping the elephant, very slowly begin to push him up towards the ceiling as you exhale and extend your leg. it doesn’t have to reach completely straight! The action of pressing up int that imaginary weight and staying strong is far more important.
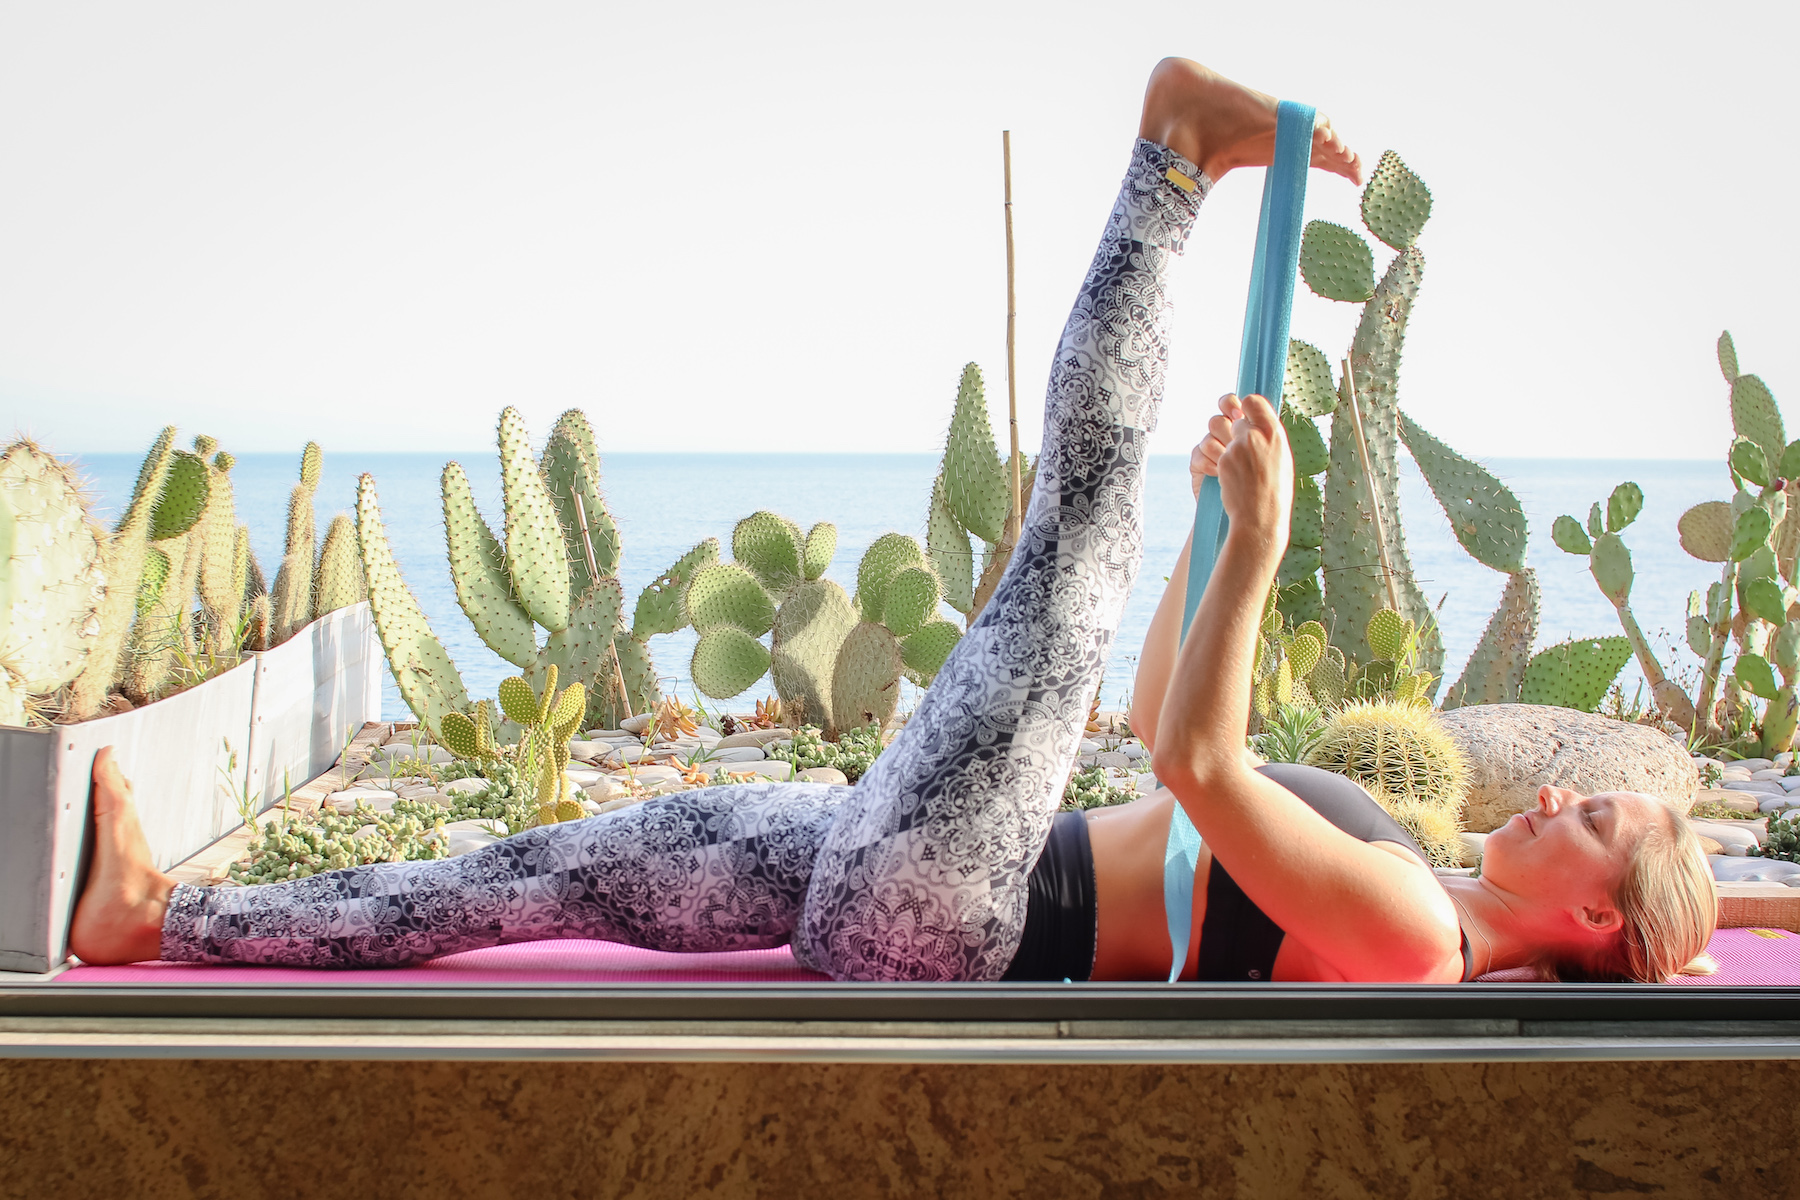
Hold for five to 10 breaths, then bend your right knee to your chest and change sides.
In conclusion…
Keep working to balance your strength and flexibility for happy hamstrings! Let me know of any other yoga poses you love for hamstring strength.
*Photos all taken at the beautiful yoga shall at Surf Maroc Amouage.


Leave A Comment